Watch a Video: Copying a Sage Vantage course
If you have created a Vantage course in the past, you may wish to copy that course to use for another section in the same term or for a new term.
TIP: Copying a course is a one-time action. You should finish customizing the assignments and due dates of your course before making a copy of it. After you finish the copy process, changes will need to be made to both courses separately.
When making a course copy, the following information is retained in the copy:
- Gradebook Settings
- Individual Assignment Settings
- Hidden Chapters
The following information is not copied:
- Course ID
- Students
- Grades
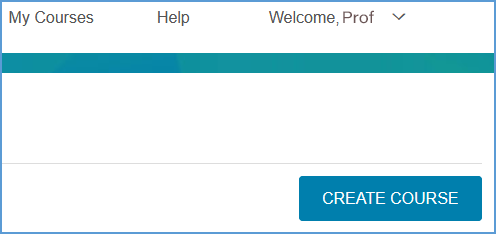
To get started, select the Create Course button at the top right of your My Courses dashboard.

Choose Copy an Existing Course

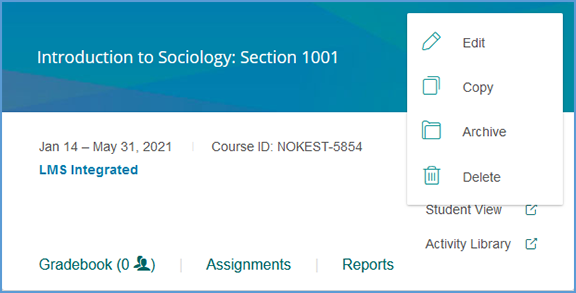
Another option is to select the gear icon in the top right corner of your course tile opens the Course Management Tools menu.

Selecting Copy in the menu listing provides a shortcut to copy the course.

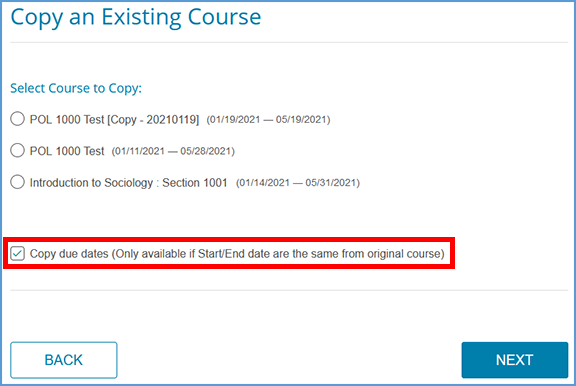
You will see a list of all of your courses available to copy.
Locate the course you want to copy and select it.
Scroll to the bottom of the page. If the course dates of your old and new courses match – for example, if you are running multiple sections of the same course in a single term – you can copy the due dates as well.
Tick the “Copy due dates” checkbox to retain them.

Once you have made your selection, select the Next button to continue.
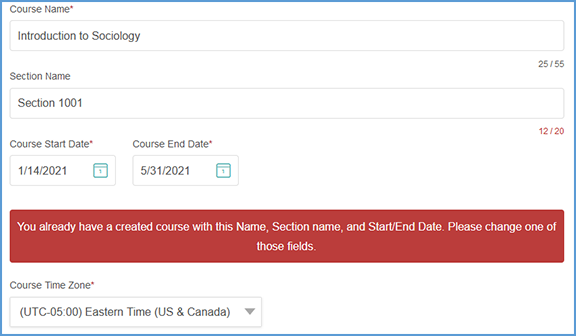
On the following page, you will be asked to change at least one of the following pieces of course information:
- Course Name
- Section Name
- Course Dates

Once you change one or more of these fields, select the Next button to move to the next step: 3. Review & Complete Course. As with the normal course creation process, you can select the pencil icon next to each section to make changes.

Review the Gradebook Settings, and make desired changes by selecting the pencil icon.

Review the Global Assignment Settings, and make desired changes by selecting the pencil icon.

When you are satisfied with your course settings, select Complete to finish creating your course. On the course creation confirmation page, use the respective Copy buttons to copy your course link (used for non-LMS integrated courses only) or Course ID. You can then paste these details to wherever you want to store the information.
TIP: For courses with LMS integration, students will register by clicking on any Vantage link that you have created within your LMS course.
You can also click the Send button to email a copy of this information to yourself. Once you are finished on this page, select Back to My Courses to return to your My Courses Dashboard.

From the My Courses Dashboard, you can go to the copied course's Assignments tab to apply more granular settings for each chapter and/or assignment.
Was this article helpful?
That’s Great!
Thank you for your feedback
Sorry! We couldn't be helpful
Thank you for your feedback
Feedback sent
We appreciate your effort and will try to fix the article